Staining Your Cedar: Must-Know Tips for Perfect Results
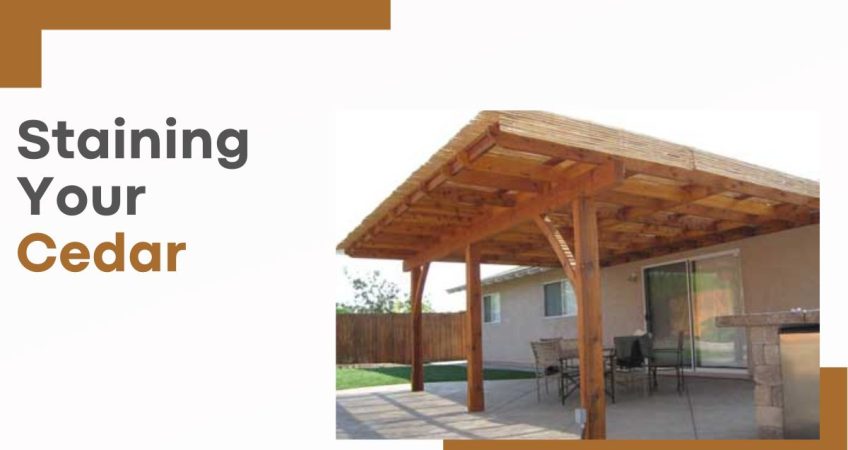
Cedar wood, with its stunning visual appeal and unrivaled durability, is a choice material for the discerning homeowner. Its natural robustness makes it a favourite for those seeking long-lasting beauty, yet it is the transformative power of staining that truly unlocks the potential of this remarkable wood. When effectively applied, stain not only enhances the cedar’s innate aesthetics but also fortifies its resistance to the elements, ensuring your cedar surfaces retain their allure for years to come.
Embark with us on a journey to perfect the art of staining, and discover how you can make your cedar installations the envy of the neighborhood!
Understanding Cedar Wood Characteristics
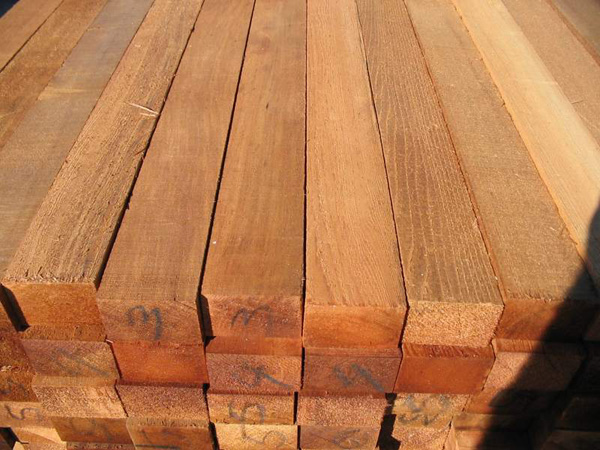
Cedar wood is inherently rich in oil and tannins, giving it a distinct aroma, beautiful color variations, and making it highly resilient to rot and decay. These natural oils enable cedar wood to repel moisture, insects, and even UV rays, enhancing its durability. Furthermore, this oil-rich nature makes cedar highly receptive to staining, allowing the stain to penetrate deeply and evenly.
There are several varieties of cedar, each with its own unique characteristics. Western Red Cedar, for example, is renowned for its deep, reddish-brown color and straight grain, making it a popular choice for decking and siding. On the other hand, Northern White Cedar possesses a lighter hue with a fine, uniform texture, ideal for intricate woodwork. Finally, Yellow Cedar is exceptionally hard and dense, with a uniform pale yellow color that takes on a silvery sheen with age, perfect for heavy-duty outdoor structures.
Understanding these characteristics can help choose the right cedar variety for your project and the most suitable staining technique to enhance its natural beauty.
Choosing the Right Stain for Cedar
Selecting the right stain for your cedar is crucial to accentuate its natural beauty and to enhance its durability. Stains primarily come in three types: Transparent, Semi-Transparent, and Solid.
Transparent stains are ideal for those who wish to highlight the cedar’s innate aesthetics, as this type allows the wood’s natural grain and texture to shine through. However, they offer less UV protection compared to other types.
Semi-Transparent stains offer a balance between color and texture visibility, providing moderate UV protection while still allowing some of the wood’s natural features to be visible.
Lastly, Solid stains behave much like paint, providing the highest level of UV protection and the most uniform color, but hiding much of the wood’s natural appearance.
When it comes to color selection, it’s important to consider the cedar’s natural hue and the desired final look. The chosen color should complement the cedar’s variety and the surrounding elements.
Transparency is another critical factor to consider. It determines how much of the wood’s natural features will be visible after staining.
Finally, consider the stain’s UV protection level. Cedar wood, while naturally resistant to UV rays, can benefit from added protection to maintain its color and longevity. Careful consideration of these factors will help you choose the perfect stain for your cedar project.
Preparing Cedar Surfaces for Staining
Before staining, it is vital to properly prepare your cedar surfaces to ensure a smooth and uniform finish. This typically involves a thorough cleaning to remove any dirt, mildew, or moss that could prevent the stain from adhering properly. Pressure washing is a commonly recommended method for this, although care should be taken not to damage the wood with too high of pressure. After cleaning, allow the wood to dry completely before proceeding with staining.
After cleaning, the next step is sanding. Sanding smoothes out any rough spots on the wood’s surface and opens up the pores of the wood, allowing for maximum stain absorption. Use a medium-grit sandpaper for this process and always sand along the grain, not against it, to avoid scratches and gouges.
If your cedar surfaces had a previous coat of stain or sealant, it needs to be entirely removed before applying a new stain. Stripping is often required to remove old stain or sealant, and several effective strategies can be used. Chemical strippers can be applied to dissolve the old stain, making it easy to scrub off. Alternatively, sanding can also be used, but it can be more labour-intensive and may not remove all of the old stain. Always remember to protect yourself with appropriate safety gear when using chemical strippers.
Read More: The Elegance of Cedar Patio Covers: Enhancing Your Outdoor Spaces
Tips for Staining Cedar Effectively
Now that we’ve laid out the groundwork for staining cedar, let’s delve into some practical tips that will help you achieve the perfect finish. From choosing the best staining tools to identifying the optimal weather conditions, these pointers will guide you in your quest to beautify and protect your cedar installations.

Using the Right Tools: Brushes, Rollers, or Sprayers
The choice of tools can greatly influence the finish of your staining project. Brushes are great for detail work and are best for getting the stain into the cedar’s grain. Rollers can cover large areas quickly, but may not provide an even coat or penetrate the wood as effectively. Sprayers are useful for large or complex surfaces and can provide an even coat, but require careful handling to avoid overspray. Use quality tools for better results and clean them properly after use.
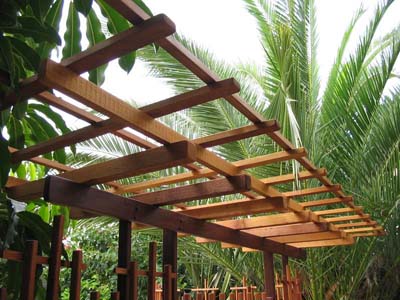
Staining Techniques: Brushing, Wiping, or Spraying
The staining technique you choose can impact the finish of your cedar staining project. Brushing involves applying the stain with a brush and is an effective method for getting stain deep into the wood grain, providing a rich, even finish. Wiping is another method where the stain is wiped on and off with a rag, and it can be used for a more controlled and even application. Spraying involves using a sprayer to evenly coat the cedar surface, which can be faster and more efficient for large projects. Regardless of the method, always ensure the stain is applied along the grain of the wood for the best results.
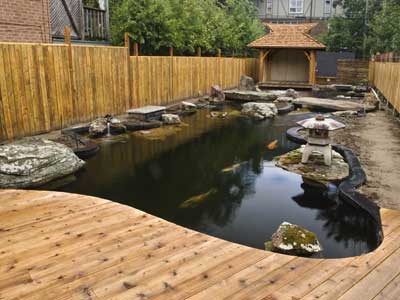
Best Practices for Staining Cedar Decks and Fences
When it comes to staining cedar decks, there’s a straightforward step-by-step process that can ensure optimal results.
- Inspect the deck: Check for any loose boards, nails, or screws. Repair as necessary before beginning the staining process.
- Clean the deck: Use a deck cleaner to remove any mold, mildew, or stains. Ensure the deck is thoroughly rinsed and allowed to dry before moving to the next step.
- Sand the deck: Sand the deck using a medium-grit sandpaper to create a smooth surface. Always sand in the direction of the wood grain to avoid scratches.
- Apply the stain: Based on your choice of stain and desired finish, apply the stain using a brush, roller, or sprayer. Always ensure an even application and don’t forget to stain all sides of the deck for a uniform finish.
- Seal the deck: After the stain has completely dried, apply a sealant to protect your deck from UV rays and water damage.
Staining cedar fences can be slightly different from staining decks, mainly due to their vertical nature. Still, the basic principles remain the same.
- Inspect the fence: Look for any broken or loose boards, as well as any signs of insect damage or rot. Make repairs as necessary.
- Clean the fence: A pressure washer is often the most efficient way to clean a fence. Use a mild detergent and low pressure to avoid damage to the wood. Allow the fence to dry thoroughly.
- Apply the stain: Use a sprayer, roller, or brush to apply the stain. Start at the top and work your way down, making sure to catch any drips.
- Seal the fence: After staining, apply a sealant for added protection from the elements.
By following these detailed steps, you can ensure even coverage and a long-lasting, beautiful finish on your cedar decks and fences.
Weather Considerations and Timing
The weather conditions during staining can greatly affect the outcome of your cedar staining project. Ideal weather conditions for applying stain are typically a dry, overcast day with temperatures between 50-70°F. Direct sunlight can cause the stain to dry too quickly, potentially leading to uneven absorption and a less-than-ideal finish. Similarly, high humidity or rain can prevent the stain from properly adhering to the wood, leading to blotchy, uneven staining.
The seasonal timing of your staining project is another key consideration. It’s best to stain cedar when it’s had some time to dry out after the wetter winter and spring months, typically in late spring or early summer. This allows the cedar to be at its most receptive to the stain, resulting in a more durable and visually pleasing finish. However, it’s important to check the forecast and ensure there are several dry days before and after your project to allow the stain to properly dry and cure. Remember, staining at the wrong time of year or in unsuitable weather can lead to disappointing results, so plan accordingly to get the optimal results for your cedar staining project.
Troubleshooting Common Cedar Staining Issues
Uneven staining or blotching occurs when the stain is absorbed differently in various parts of the cedar, leading to an inconsistent finish. This is often the result of differing levels of wood porosity or improper stain application. To prevent this, ensure the cedar surface is clean, dry, and sanded evenly before staining. If uneven staining or blotching occurs, a light sanding followed by another coat of stain can often correct the issue.
Overlapping stain or drips are another common staining problem. These typically result from applying too much stain or not maintaining a ‘wet edge’ when staining large areas. To avoid overlaps and drips, always begin staining at one end and work your way across, maintaining a wet edge as you go. If drips occur, wipe them up immediately with a rag. Overlapping stains can be more difficult to address and may require sanding and re-staining for best results.
Read More: Discovering the World of Cedar Gazebos
Maintaining Stained Cedar Surfaces
Regular maintenance of stained cedar surfaces not only guarantees the preservation of their beautiful finish, but also extends their longevity. Regular cleaning involves washing the cedar surfaces lightly with a soft brush and mild detergent. It is vital to avoid harsh chemicals or pressure washing, which could damage the wood and the stain. Inspection should be carried out at least twice a year, mainly focusing on checking for any signs of wear and tear, weather damage, or fungal growth. Any detected issues should be addressed promptly to prevent further damage.
The frequency of reapplication depends on various factors like weather conditions, the quality of the preceding stain job, and the specific type of stain used. Generally, horizontal surfaces like decks, which are continuously exposed to the elements, will require re-staining more frequently, typically every 2-3 years. For vertical surfaces like fences, re-staining might only be necessary every 4-5 years. However, these are approximate guidelines and the best approach is to monitor the surface closely and restain as soon as the finish begins to fade or peel. The reapplication process involves cleaning, light sanding, and then restaining the surface.
Always remember, for the best results, the surface must be completely dry and free of debris prior to the reapplication of stain.
Conclusion
In conclusion, staining cedar surfaces, whether decks or fences, is a task that requires careful preparation, consideration of weather conditions, attention to application technique, and ongoing maintenance. The results, however, are well worth the effort, rewarding you with an aesthetically pleasing, durable cedar surface that not only enhances the beauty of your outdoor space but also stands the test of time. Remember, the key to successful staining lies in the details – the right temperature and humidity, maintaining a wet edge during application, and ensuring the cedar surface is clean and dry. Regular maintenance will ensure your cedar surfaces remain beautiful and durable for years to come.
Now that you’re equipped with these practical tips and insights, you’re ready to embark on your cedar staining project with confidence. And remember, for all your cedar staining needs, Wood’s Shop is here to help. With a wide range of high-quality stains and sealants, as well as expert advice, Wood’s Shop is your one-stop solution for achieving beautiful, long-lasting results in your cedar staining projects.