DIY Wood Gazebo – Crafting Your Backyard Paradise

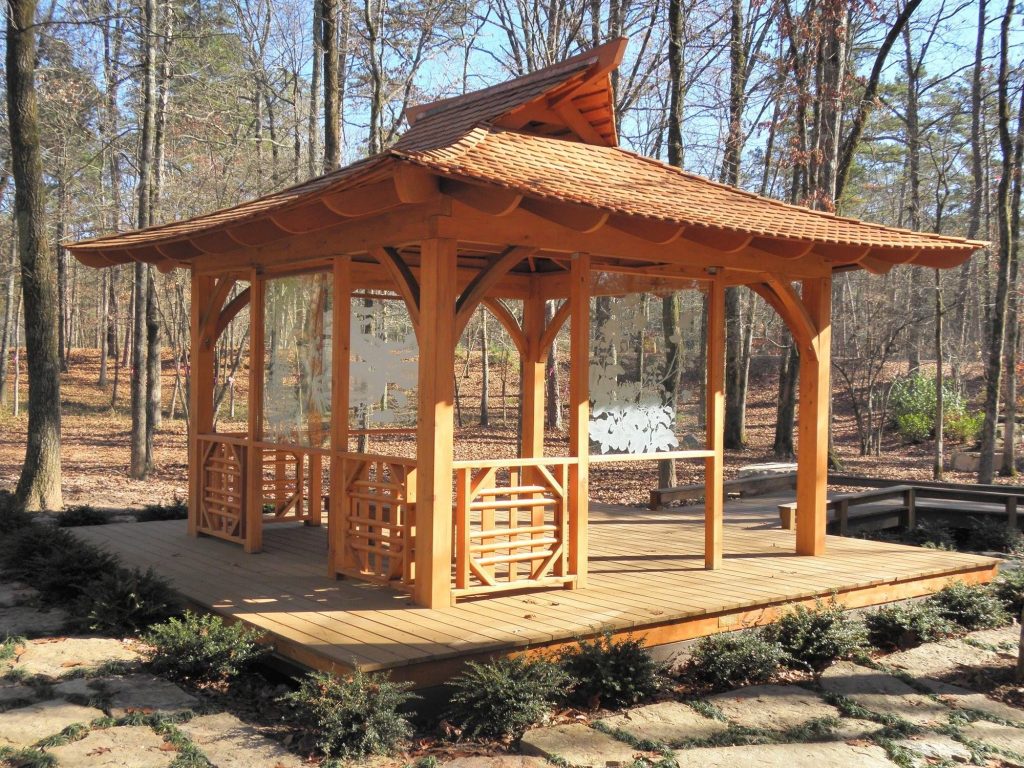
A DIY wood gazebo is a splendid way to transform your backyard into a serene oasis. It’s an inviting retreat within the comfort of your own home, a place where you can relax, entertain, or simply enjoy the serenity of nature. The real charm lies in the process of crafting it yourself; the hands-on approach brings not just a sense of fulfillment and satisfaction, but also the freedom to customize your gazebo to fit your unique vision. This project is more than just construction; it’s about creating a personal paradise in your backyard.
Benefits of a DIY Wood Gazebo
Building your own gazebo has numerous advantages. For starters, the cost savings can be significant when compared to purchasing pre-built gazebos. Pre-fabricated models often come with a premium price tag, and that does not include the potential costs for delivery and installation. A DIY approach allows you to control expenses, choose affordable materials, and save on labor costs.
Moreover, constructing a gazebo from scratch offers you complete customization. You can design it to perfectly match the existing aesthetics of your backyard or create a distinctive centerpiece that stands out. Size, shape, design – everything can be tailored to your particular needs and taste. Want a romantic Victorian-style gazebo, or perhaps a sleek modern one? The choice is entirely yours.
Creativity is another significant aspect of a DIY project. From choosing the type of wood, and selecting the right finish, to deciding on the roofing material, each step offers a chance to incorporate your unique touch. This way, your DIY wood gazebo becomes more than just a structure; it turns into a personal project that showcases your creativity and handiwork.
Planning Your DIY Wood Gazebo
Planning is a crucial aspect of any DIY project. Building a gazebo is no exception. Here is a step-by-step guide to help you plan your project successfully:
- Identify the Purpose: Before you start sketching your gazebo plans, identify what you will be using the gazebo for. Will it be a quiet place for reading and relaxation, or will it be used for entertaining guests? Understanding its purpose will help guide the design process.
- Select the Ideal Location: Your gazebo should be situated in a location that best suits its purpose. If it’s meant for relaxation, choose a calm, quiet corner of your backyard that offers privacy. If it’s for entertaining, make sure it’s easily accessible and has room for seating and barbecue equipment.
- Choose the Size and Style: The size of your gazebo should be determined by its purpose, the available space in your backyard, and your budget. As for the style, it should reflect your personal taste and complement the overall aesthetics of your home and garden.
- Draw a Detailed Plan: Once you’ve decided on the size and style, draw a detailed plan. Include all dimensions, materials needed, and any decorative elements you want to add. This will make the construction process easier.
- Gather Your Materials and Tools: Purchase all the materials and tools you will need based on your plan. Don’t forget protective gear such as gloves and safety glasses.
With proper planning, your DIY wood gazebo project will run smoothly, and you’ll have a beautiful backyard paradise in no time.
Materials and Tools
When undertaking a DIY wood gazebo project, the choice of materials and tools is pivotal. There is a wide array of tools and materials necessary, and their selection is often based on the specific design and size of your gazebo.
Materials: The primary material, wood, should be of high quality to ensure your gazebo’s durability and longevity. Cedar or redwood are excellent choices due to their natural resistance to rot and pests. Other materials you’ll need include metal brackets for structural support, screws, and nails for assembly, and roofing materials such as shingles or metal sheets – depending on your aesthetic preference.
Tools: The type of tools required will greatly depend on your experience and the intricacies of your gazebo design. Some basic tools needed are a circular saw for cutting wood, a power drill for making holes and driving screws, a hammer, a tape measure, a level for ensuring straight and level construction, and safety equipment like gloves and safety glasses to protect you during the building process.
Remember, the quality of your tools and materials directly impacts the outcome of your project. Therefore, it’s crucial to invest in good quality items that will guarantee a gazebo that not only looks great but also stands the test of time.
Constructing the Gazebo Frame
Constructing the frame is the first step in physically bringing your gazebo to life. This phase lays the foundation for your structure and its stability. Follow this step by step guide to ensure your gazebo frame is strong and sturdy.
- Lay Out the Base: Start by laying out the base footprint. Use stakes and strings to mark out the exact dimensions of your gazebo. This will serve as your guide for digging the post holes and aligning your frame.
- Dig Post Holes and Install Posts: Dig holes for the posts at the corners of your marked out area. These holes should be deep enough to secure the posts and provide stability. Once the holes are dug, place the posts and secure them with concrete. Ensure the posts are level and let the concrete set completely before proceeding.
- Assemble The Floor Frame: Next, assemble the floor frame on top of the posts. Use joists to connect the posts and lay down the flooring. Ensure the flooring is completely level before securing it with screws.
- Set Up the Roof Support: Once the floor frame is secured, set up the roof support. This usually involves constructing a center post that supports the roof. Attach the beams to the posts and ensure they are level.
- Attach the Rafters: Finally, attach the rafters to the center post and outer frame. These should be evenly spaced and secure.
Tips for Ensuring Stability and Structural Integrity
A stable gazebo starts with a solid foundation. Ensure your posts are deep enough in the ground and securely concreted. When constructing the frame, always double-check that everything is level. It’s also crucial to use weather-resistant materials and finishes to protect your structure from the elements.
Guidance on Framing Techniques and Measurements
Framing a gazebo involves several techniques. The use of a circular saw will ensure accurate cuts, while a good power drill will make assembling the frame easier. Always measure twice before cutting, and use a spirit level to ensure everything is straight and level.
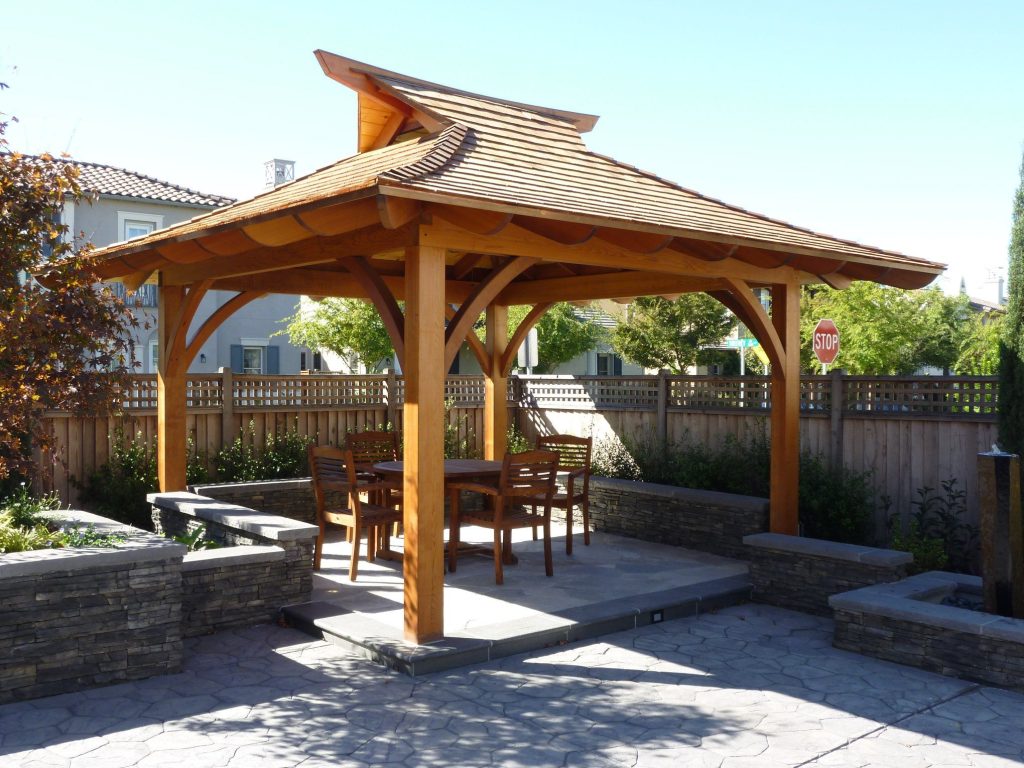
Adding the Roof and Flooring
The installation of the roof and flooring significantly contributes to the overall aesthetics and functionality of your gazebo.
Detailed instructions for installing the roof structure
Once you have fitted the rafters, it’s time to add the roof. Start by attaching plywood sheets to the rafters to create a solid base. Secure the plywood using roofing nails. Once the base is ready, you can add your chosen roofing material. If you’re using shingles, start from the bottom and work your way up, ensuring each row overlaps the previous one. This will prevent water from seeping through. If you’re using metal roofing, align your sheets with the eave of the roof and secure them with roofing screws.
Choosing suitable roofing materials
The choice of roofing material should be guided by your local climate, the aesthetic of your home, and your budget. Asphalt shingles are a popular choice due to their durability and variety of styles. Metal roofing is also an excellent option, known for its longevity and easy maintenance. In humid climates, consider using treated wood shingles for their excellent moisture resistance.
Flooring options and installation methods
The flooring you choose for your gazebo should complement its design and withstand the outdoor conditions. Popular options include wood decking, pavers, and concrete. Wood decking offers a warm, natural feel, but requires regular maintenance. Pavers provide a variety of design options, while concrete is durable and low-maintenance.
To install wood decking, start by securing deck boards to the floor joists using deck screws. For pavers, prepare a solid base of compacted gravel and sand before setting the pavers. Concrete flooring requires the preparation of a concrete mix, which is then poured into a wooden frame built to your desired floor size and leveled off.
Remember that the choice of roofing and flooring materials will significantly impact the lifespan and maintenance requirements of your gazebo, so choose wisely.
Read More: Discovering the World of Cedar Gazebos
Customizing Your DIY Wood Gazebo
Customizing your gazebo not only adds an attractive feature to your garden but also provides a unique space that reflects your personal style and taste.
Personalization Ideas
Whether you’re inclined towards an elegant, rustic, or modern look, you can accomplish this by painting or staining your gazebo. Paint offers a wide range of colors to match your exterior decor, while stain enhances the natural beauty of the wood. Decorative elements like trellises, planters, or string lights can add visual interest and create a welcoming atmosphere.
Adding Seating, Lighting, and Other Features
Comfortable seating is a must for any gazebo. Whether it’s built-in benches, outdoor sofas, or a hammock, your choices should reflect the main use of your gazebo – be it for relaxation, socializing, or dining. Consider adding outdoor lighting to extend its use into the evening. Pendant lights, lanterns, or string lights can provide both illumination and ambience. Other features could include a fire pit for cooler nights, or even a built-in barbecue for outdoor meals.
Making Your Gazebo a Reflection of Your Style
Ultimately, your gazebo should be a reflection of you – it’s an opportunity to express your creativity and style. From a boho-chic space with colorful cushions and fairy lights to a sophisticated spot with stylish outdoor furniture and a chandelier, the design possibilities are endless. Choose elements that resonate with you, and remember, it can always be updated as your style evolves.

Maintenance and Care
Keeping your gazebo in prime condition requires regular maintenance and care.
Tips for Preserving the Wood and Extending the Gazebo’s Life
Wooden gazebos are beautiful and durable, but they do require some care to stay in good shape. To preserve the wood, consider applying a wood preservative annually. This will protect the gazebo from insects, rot, and weather-related damage. Using a good quality paint or stain can also help to shield the wood from the elements, and prolong the life of your gazebo.
Regular Maintenance Tasks to Keep It in Top Condition
Regular maintenance tasks include checking and repairing any loose or damaged parts, cleaning the roof and gutters, and washing the wooden parts with a mild detergent solution to remove dirt and prevent the growth of mold and mildew. It’s also essential to regularly check the structure for any signs of rot or insect damage.
Seasonal Care Routines
Seasonal care routines vary based on your local climate. In winter, it’s advisable to remove any heavy snow from the roof to prevent structural damage. During autumn, clean the gutters and roof to remove fallen leaves, which can trap moisture and cause damage. In spring and summer, check for any necessary repairs, clean the wood, and reapply wood preservative, paint, or stain as needed.
Taking care of your gazebo not only extends its lifespan but also ensures it remains a beautiful and functional part of your outdoor living space.
Read More: How a Backyard Gazebo Transforms Your Landscape
Conclusion
Building your own DIY wood gazebo is a rewarding endeavor. Not only does it provide you with a private, beautiful space to relax and entertain, but it also allows you to enhance your outdoor living area and improve the overall aesthetic and value of your property. The personal satisfaction that comes from creating something with your own two hands is hard to match.
We encourage you to embark on your gazebo-building journey. It may seem like a daunting task at first, but with careful planning and a little patience, you can create a unique structure that will serve you well for many years to come.
At every step of your journey, from choosing the right materials and tools, to drawing up plans, building, and maintaining your gazebo, we are here to provide assistance and guidance.
And remember, at Wood’s Shop, we are committed to providing the best solutions for your outdoor projects. Our team of experts is always available to guide you through the process and help you make the best choices for your needs. Don’t hesitate to reach out to us for any queries or concerns. With Wood’s Shop, you’re never alone on your DIY journey.
Frequently Asked Questions
- What are the best materials for gazebo flooring?
The best material for gazebo flooring depends on your preference and maintenance capacity. Wood decking offers a natural feel but needs regular maintenance. Pavers provide varied design options, while concrete is durable and low-maintenance.
- What are some great ideas to customize my gazebo?
Painting or staining your gazebo to match your exterior decor is a great idea. You can also add decorative elements like trellises, planters, or string lights. Comfortable seating, outdoor lighting, a fire pit, or a built-in barbecue are other features that can enhance your gazebo.
- How can I preserve my wood gazebo and extend its life?
Applying a wood preservative annually will protect your gazebo from insects, rot, and weather-related damage. Regular checks and repairs of any loose or damaged parts, cleaning the roof and gutters, and washing the wooden parts with a mild detergent solution can also help maintain your gazebo. Seasonal routines, such as removing snow in winter and leaves in autumn, are also crucial.