Easy Outdoor Elegance: DIY Pavilion Kit Unveiled

Creating an elegant outdoor space has never been easier with the advent of DIY pavilion kit. These kits provide homeowners with the tools and materials necessary to transform their backyard into a relaxing oasis or an entertainment hub. As more and more people realize the untapped potential of their outdoor spaces, there has been a growing trend towards enhancing these areas.
Whether it’s to host summer barbecues, family get-togethers, or simply to have a peaceful retreat to unwind, a well-designed pavilion can significantly elevate the aesthetics and functionality of your backyard.
The Allure of Outdoor Pavilions
Outdoor pavilions serve as much more than just a beautiful centerpiece for your backyard—they offer a myriad of practical benefits. One of the most significant advantages is the provision of shade. Regardless of how scorching the sun is, a pavilion ensures that you can enjoy your outdoor space comfortably. It also provides shelter, protecting your outdoor gatherings or barbecues from unexpected rain showers. Moreover, a well-placed pavilion acts as a focal point that adds structure to your backyard.
Aesthetically, pavilions have a tremendous impact on the overall appearance of your outdoor space. They introduce an element of architectural beauty that can be further enhanced with strategic decorations or lighting. A beautiful pavilion turns your backyard from merely functional to inviting and atmospheric, encouraging more outdoor time and fostering a stronger connection with nature. Whether you’re aiming for a rustic, traditional look or a sleek, modern design, the right pavilion can truly transform your outdoor area into a picturesque retreat.
Introducing the DIY Pavilion Kit:
A DIY Pavilion Kit is a comprehensive, ready-to-assemble package designed to create a beautiful backyard pavilion. These kits are a convenient, hands-on solution for homeowners looking to enhance their outdoor space without the complications of sourcing materials or designing from scratch. Instead, each kit contains everything needed to construct a pavilion, ensuring a straightforward and accessible project for a variety of skill levels.
The true beauty of these kits lies in their simplicity and convenience. Each kit contains all the necessary pre-cut and high-grade materials, from the timber to the necessary hardware. But beyond the materials, the kits come with detailed step-by-step instructions to guide homeowners through the assembly process. The instructions are designed to be easy to follow, making the construction process approachable even for those with minimal carpentry or DIY experience. Thus, the DIY Pavilion Kit provides an accessible solution for homeowners to create an elegant, functional, and personalized outdoor space.
Read more about 5 Reasons Why a Custom Gazebo Kit is a Game-Changer.
Essential Tools and Materials:
The tools required for assembling a DIY Pavilion Kit are fairly basic and can typically be found in most households. The essential tools include a hammer, a drill (preferably cordless for ease of movement), screwdrivers, a measuring tape, and a ladder. Safety equipment such as gloves, safety glasses, and closed-toe shoes are also recommended.
As for materials, the DIY Pavilion Kit contains everything you need. This includes pre-cut, high-grade timber for the main structure and roofing, all necessary hardware such as screws and brackets, and often a weather-resistant finish to protect the pavilion from elements.
Component Breakdown:
The DIY Pavilion Kit is designed to be straightforward and easy to assemble, each component has its purpose within the structure:
- Pre-cut Timber: This forms the basis of the pavilion structure, including the posts, beams, rafters, and roof slats. The timber pieces are pre-cut to size, eliminating the need for complicated measurements or cutting.
- Hardware: The kit includes all the necessary hardware, such as screws, bolts, and brackets, required for assembly. These are used to secure the timber pieces together, ensuring a sturdy and durable structure.
- Roofing Material: Depending on the design of the pavilion, the roofing material may differ. Some kits come with traditional wooden slats, while others offer options like metal sheets or shingles. The roofing materials provide a protective layer for the pavilion, shielding it from weather elements.
- Weather-Resistant Finish: To increase the longevity of the pavilion, a weather-resistant finish is often included in the kit. This finish protects the wood from water, UV rays, and other potential damage caused by weather exposure.
- Assembly Guide: The kit includes a step-by-step guide that provides clear instructions on how to assemble each part of the pavilion. This guide makes the assembly process approachable for people of all skill levels.
Step-by-Step Assembly Guide:
Assembling a DIY Pavilion Kit can be a rewarding project, transforming your backyard into a beautiful outdoor living space. To make the assembly process as straightforward as possible, we have broken it down into manageable steps, accompanied by clear instructions and helpful visuals.
- Preparation: Before you start assembling, it’s crucial to prepare the area where the pavilion will be constructed. This includes clearing the space of any debris and ensuring the ground is level. Lay out all of the components included in your kit and familiarize yourself with each piece.
- Assemble the Base: Start by assembling the base of the pavilion. This typically involves attaching the pre-cut timber posts to the base plates using the included hardware. Make sure each post is secured and upright.
- Construct the Frame: Once the base is secure, you can start building the frame. This involves attaching the beams to the posts. Again, ensure each piece is securely fastened and level.
- Install the Roof: The next step is to install the roof. Depending on the kit, this may involve attaching wooden slats or metal sheets to the top of the frame. Ensure each piece is securely fastened and properly aligned.
- Apply the Finish: The final step is to apply the weather-resistant finish. This will protect your pavilion from the elements and help it last longer.
- Final Touches: Once the finish has dried, you can add any final touches. This might include installing lights, hanging planters, or adding furniture.
Remember to follow the specific instructions included in your DIY Pavilion Kit. The guide included will provide you with detailed information to help you through each stage of the process. Happy building!
Personalization and Design:
Creating your own pavilion is not just about constructing a functional outdoor space, it’s also an opportunity to add a personal touch and create a unique environment that reflects your style and preferences. The DIY Pavilion Kit allows for a great deal of customization, so you can truly make the pavilion your own.
Paint and Stain:
Once you’ve assembled your pavilion, consider adding a coat of paint or stain to give it a unique look. You can choose a color that complements your home’s exterior, or go for something bold and eye-catching. If you prefer a more natural look, a wood stain can enhance the grain of the timber and give your pavilion a rustic, organic feel. Whatever you choose, remember to use products that are designed for outdoor use to ensure durability and longevity.
Embellishments:
Additional embellishments can further enhance the elegance and functionality of your pavilion. Consider installing decorative lighting for evening use, or hanging plants for a touch of green. If your pavilion is near a pool, consider installing hooks for towels or pool accessories. If it’s primarily for dining, think about adding a bar or a built-in grill. The possibilities are endless, and the beauty of a DIY Pavilion Kit is that you can adapt it to your needs, preferences, and lifestyle.
Maintenance and Longevity:
Maintaining your pavilion can ensure its longevity, allowing you to enjoy it for years to come. Proper upkeep involves regular cleaning, weatherproofing, and seasonal maintenance.
Weatherproofing:
To protect your pavilion from the elements, consider reapplying the weather-resistant finish annually. This will shield the timber from water and UV damage, ensuring it stays in good condition. You may also want to consider adding additional weatherproofing measures, such as installing gutters to direct water away from the pavilion or using weather-resistant curtains or screens for added protection.
Cleaning:
Regular cleaning is also crucial for the maintenance of your pavilion. Sweeping away leaves and other debris can prevent build-up that could potentially damage the wood. For a deeper clean, use a soft brush and a mild detergent mixed with water to gently scrub the surface. Avoid using harsh chemicals that could strip the wood of its natural oils.
Seasonal Upkeep:
Seasonal maintenance is another important aspect of pavilion care. In the spring, check the structure for any winter damage and make any necessary repairs. During the summer, check for signs of sun damage, such as fading or cracking, and reapply the weather-resistant finish if needed. In the fall, prepare the pavilion for winter by cleaning it thoroughly and making sure it’s properly weatherproofed. By following these maintenance tips, you can ensure your pavilion stays beautiful and functional for many years to come.
Read More: Ultimate DIY Gazebo Kit Guide
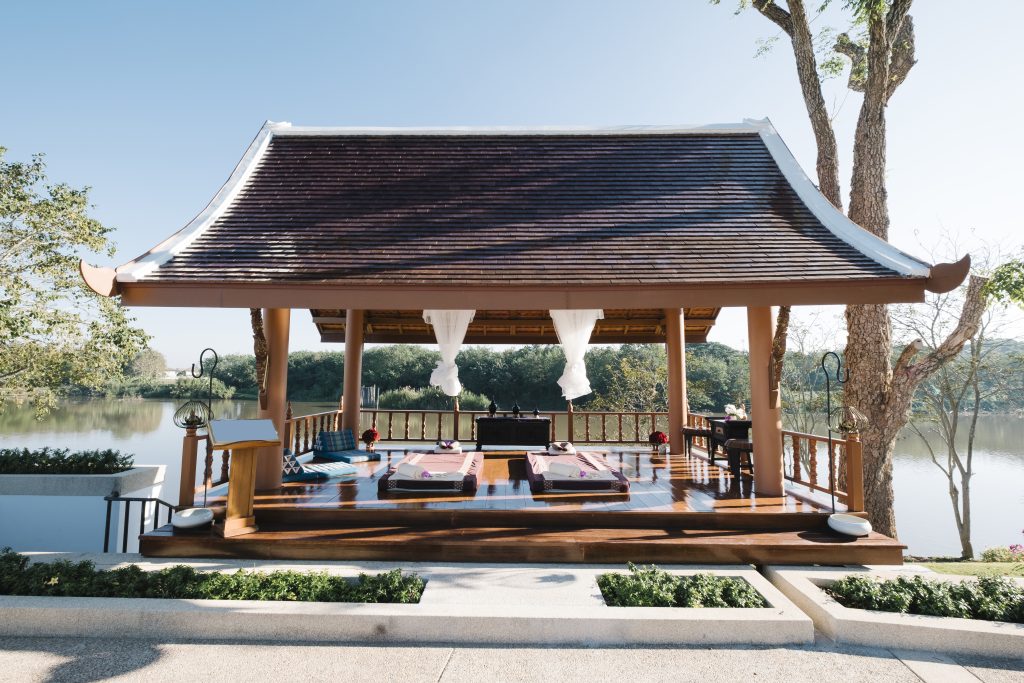
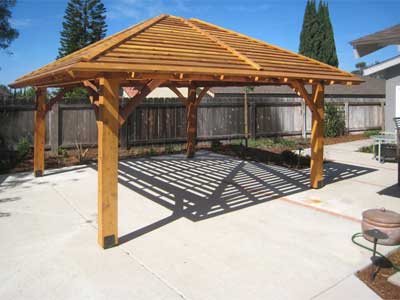
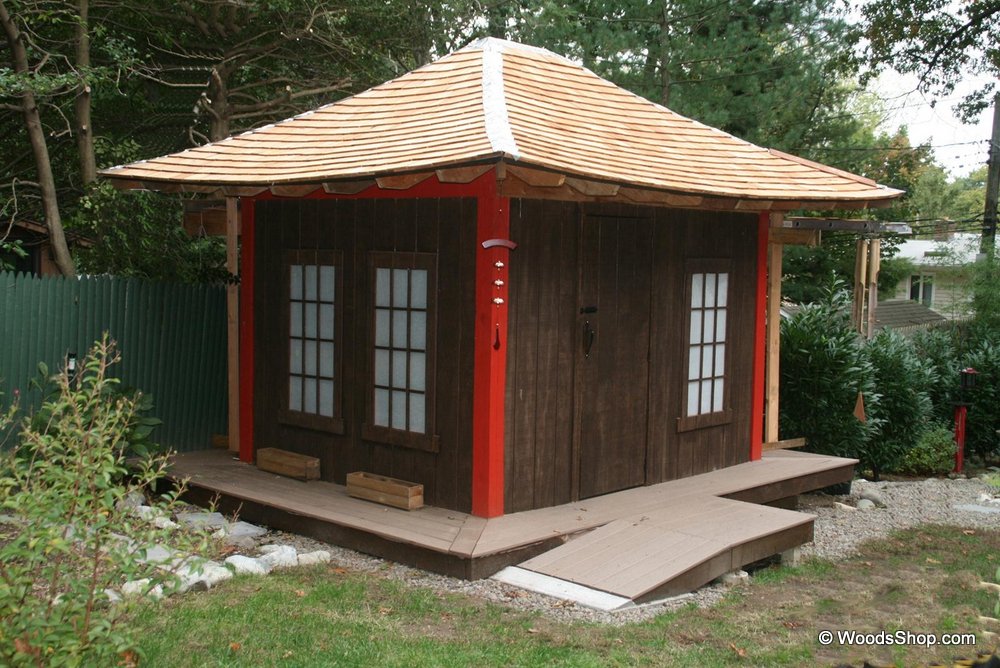
Showcasing the Finished Pavilion:
Nothing beats seeing beautiful, completed DIY pavilion projects to inspire the budding builder in you. These pavilions, constructed by individuals just like yourself, highlight the potential of our DIY Pavilion Kits, showcasing a variety of styles, sizes, and customization options. Each project is a testament to the creativity and hard work of homeowners who transformed their outdoor spaces into spectacular living areas.
Inspiring Photos:
Feast your eyes on these stunning before-and-after photos of DIY pavilion projects. Each image captures the transformation from a simple, open space to a breathtaking outdoor entertainment area. Notice the attention to detail, the personal touches, and the quality of craftsmanship evident in each project. These photos serve not only as evidence of what can be achieved with a DIY Pavilion Kit but also as inspiration for your own project.
Testimonials & Real-Life Stories:
Hear directly from our satisfied customers who took on the challenge of assembling their own pavilions. Their testimonials and real-life stories are proof of the feasibility and rewarding experience of building your own pavilion. From novices who had never embarked on a DIY project before, to seasoned builders who appreciated the ease and quality of our kits, these testimonials provide valuable insights into the process and satisfaction of constructing your own pavilion.
Conclusion:
In conclusion, a DIY Pavilion Kit offers a rewarding and satisfying way to enhance your outdoor space. The benefits are manifold, ranging from the customizable design that allows you to express your personal style to the functional benefits of providing a sheltered, elegant space for entertainment and relaxation.
Moreover, the longevity of these pavilions, ensured through regular maintenance and weatherproofing, guarantees years of enjoyment. The process of building your own pavilion, though it requires effort, provides a sense of accomplishment that is unparalleled. There’s nothing quite like standing back and admiring a beautiful, functional space that you’ve created with your own hands.
So consider adding a pavilion to your outdoor space – the satisfaction of transforming your yard into an oasis of comfort and style is worth every minute spent on the project.
Ready to create your own outdoor oasis? Trust WoodsShop for your DIY Pavilion Kit needs, offering unparalleled quality, ease of assembly, and endless customization options. Take the first step towards enhancing your outdoor living experience today with Woods Shop!
FAQs
- What are some of the customizations I can add to my DIY Pavilion Kit?
You can personalize your DIY Pavilion Kit in numerous ways, from the color and finish of the pavilion to additional embellishments like decorative lighting, hanging plants, and built-in grills.
- Why is it important to weatherproof my pavilion?
Weatherproofing your pavilion helps protect it from the elements, such as water and UV damage. This ensures the timber stays in good condition and extends the lifespan of your pavilion.
- How often do I need to clean my pavilion?
It’s recommended to sweep away leaves and other debris regularly to prevent buildup that could damage the wood. For a deeper clean, use a soft brush and mild detergent mixed with water to gently scrub the surface.
- What is involved in the seasonal upkeep of the pavilion?
Seasonal upkeep involves checking the pavilion for any winter or sun damage, reapplying the weather-resistant finish if needed, and making sure the pavilion is clean and properly weatherproofed in preparation for the winter months.
- What kind of inspiration can I get for my own DIY pavilion project?
You can get inspiration from the before-and-after photos of other DIY pavilion projects. Testimonials and real-life stories from our satisfied customers also provide valuable insights into the process and satisfaction of constructing your own pavilion.